Creative ideas and tips for how to make your own personalized family photo yearbook
If you’re anything like us, you probably have thousands of family photos sitting on your phone, computer and other devices with very few printed copies to show for it (who’s with us?!). We’ll be the first to admit that the photos in the frames around our house are so old they may even be missing a child (or two, gulp).
But thankfully we have a solution that will eradicate that mom guilt, and result in a coffee-table worthy keepsake that will become one of your most prized possessions: a yearly family photo book.
These “year in review” memory books can pull all your favorite photos into one place, so you can celebrate your family’s accomplishments, milestones and highlights, while creating a treasured time-capsule of sorts that can be passed down to your kids and their families in the future.
But if the thought of trying to organize, edit and arrange your gazillion digital photos seems a little daunting (to say the least), we’re here to help with 23 actionable steps and inspiring ideas to help get you going on behalf of our sponsor, photo book specialists, Mixbook.
Mixbook is the incredible memory-making site that has been helping us make our photo books for the past several years. Their incredibly intuitive online editor is one of the easiest we’ve used, but also allows for some serious customization. Your end result is a beautifully designed, high-quality keepsake that you’ll be proud to pass down to your children.
Our kids love taking them out and looking back at all their memories. And we pinky swear, it doesn’t have to be as time-consuming and stressful as you might think.
Stick with us – we’ll show you how!
Pin for when you’re ready to create!

GETTING STARTED
1. GET ORGANIZED
This is probably the most daunting task of the whole process, especially if you’re like us and have the best intentions of staying on top of our photo organization each year, but usually fall short.
The first step is to get all of your photos in one place so you can sort through them. Make sure you have those you’ve taken from your myriad of digital devices (phones, iPads, etc), plus any that might have been taken by family and friends (our husbands always seem to have a treasure trove of good ones where we might actually make an appearance!).
Now create a folder for the year you’re working on, and sub-folders where you’ll place your favorite photo-book-worthy pics. We suggest bucketing these sub-folders by month, season and/or special event (or take a peek at some of the fun categories we suggest later in this post), which will ultimately help you organize your ideas when it comes time to start creating.
2. BE SELECTIVE
Once you’ve picked your favorites and have them organized in folders, go through them one more time with a fine-tooth comb. However tempting it may be to keep 50 photos from the first time your son rode a pony at the zoo, do your very best to pare them down and remove photos that are very similar, or you’ll wind up with a very thick book.
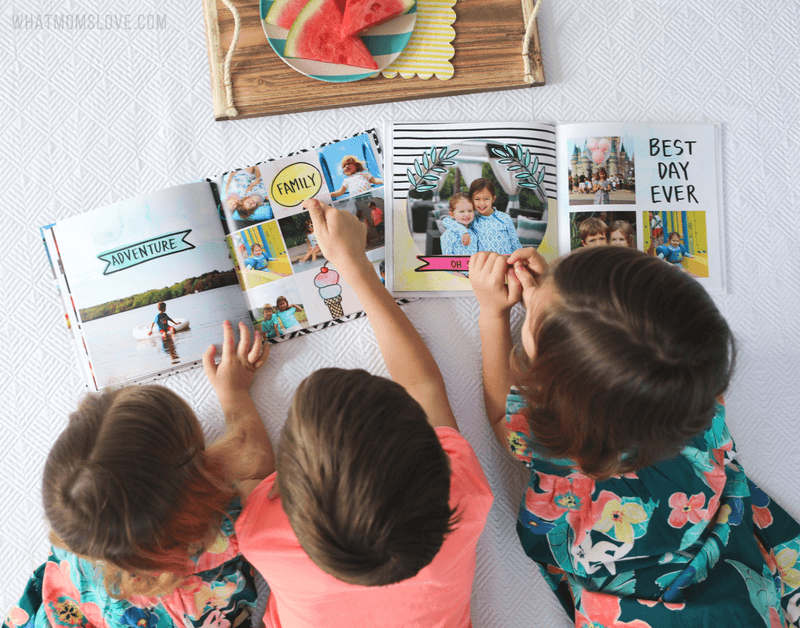
Focus on the images that will spark your memory of those extra special, meaningful moments and leave perfection at the door. Imperfection can often times be more memorable, and let’s face it, lives with kids are far from perfect – having images of the time your child wrote all over the walls in Sharpie, covered themselves in shaving cream, or photobombed a family photo will be just as treasured as those perfectly posed portraits.
3. CHOOSE THE RIGHT TOOLS
Now you have your photos, it’s time to decide what online site you’ll use to create your book. This too can be a daunting task as there are a plethora of choices from which to select. Over the years we’ve tried numerous different sites, but we stopped dipping our toes in the water once we found Mixbook.
The #1 reason: flexibility.
Mixbook gives you full creative control over your project (a blessing for us Type A’s!), allowing you to take their professionally designed themes and truly make them your own. Other design sites offer you the templates, but don’t let you adjust the size of the photos, add text, or move images and graphics around – not the case with Mixbook, which gives you complete freedom to adjust their templates as you please (or heck, even create your very own!).
In addition to this unparalleled customization, all their products feature contemporary, modern designs and are incredibly intuitive and easy to create. Score!
4. SELECT YOUR THEME + BOOK SHAPE
Again, another tough decision awaits, but Mixbook has you covered. Choose one of their 14 Year In Review themes that comes pre-designed with inspiring prompts to help you organize your years’ worth of photos. We highly suggest this option if you want more of a plug ‘n’ play book without much fussing around with customization.
However, you can also select one of their vast selection (over 350!) of Photo Book themes to use as your starting point. Whether you’re looking for a minimalist feel, vintage vibe or bold colors and patterns, you really can’t go wrong with any of their gorgeous templates. Browse through them and trust your gut (and honestly, don’t sweat this decision too much…we’ll tell you how you can mix ‘n’ match pages from different themes in our Pro Tips below!).
You’ll also have to choose your book shape: Square, Landscape or Portrait. Think about where you’ll be displaying/storing your books to help you make this choice. We find Square and Landscape look great on a coffee table, while Portrait and Square may fit better on a bookshelf (Landscape tends to stick out).
The decisions regarding the specific size of your book, type of paper and cover style will come at the end of the process, once you go to order your book.
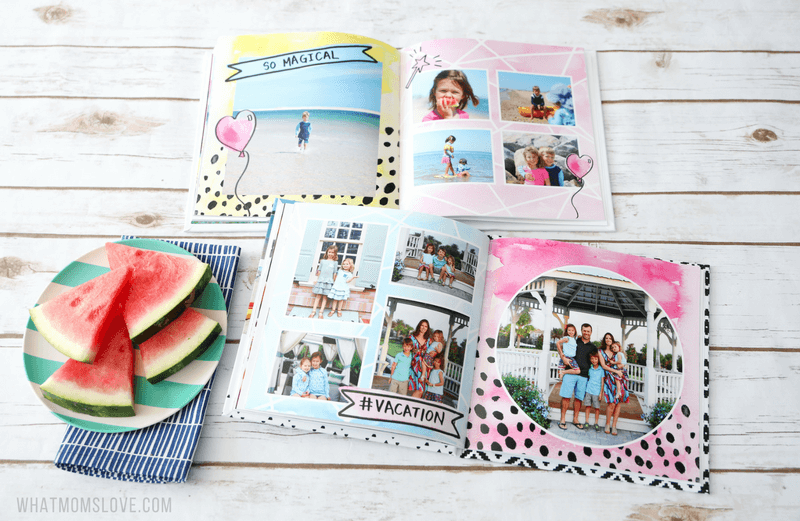
5. UPLOAD YOUR PHOTOS
Mixbook makes it super easy to get all of your photos (which you’ve already organized from Step 1, hurrah!) into their online editor. Once you create your book simply go to “Add Photos” and upload them all at once from your computer, or import them from your social media sites or photo services like Google Photos. And voila, you are ready to start creating!
INSPIRING IDEAS FOR YOUR PAGES
There’s no right or wrong way to assemble the pages of your yearly family photo book, but if you’re looking for a little direction, you may want to consider some of our favorite ideas for inspiration.
1. HIGHLIGHTS PAGE
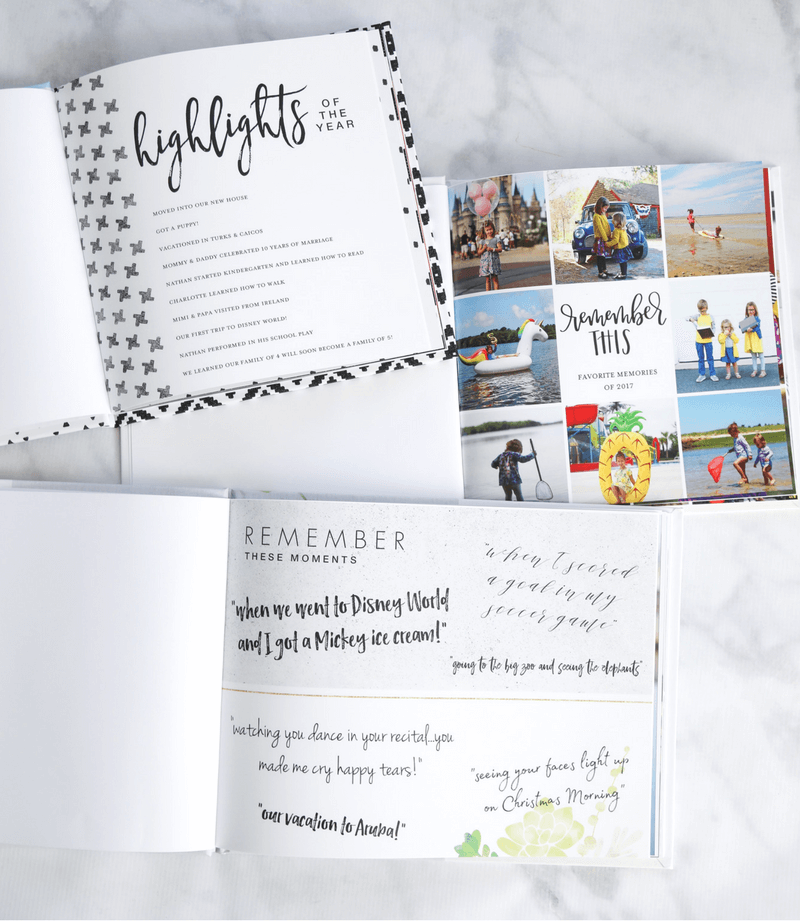
We love the idea of taking that very first page of your book to highlight all of your top memories from that year. There are many ways this can be done, including:
- Make a simple bullet list of important events and milestones like “moved into our new house”, “first trip to Disney”, “Daddy started a new job”, “Tommy learned to walk”, etc.
- Our Founder, Aly, likes to write a short letter to her kids (after all, they are the ones that these books will eventually be handed down to) telling them why the past year was so special.
- Ask your family members the question “What was your favorite memory from last year?” and arrange all their responses as quotes.
- Pick a small selection of your photos (think Top 10) that represent all your favorite memories (a family pic with Mickey or a shot opening presents on Christmas morning) and create a collage.
2. SHOWCASE KEY EVENTS AND/OR SEASONS
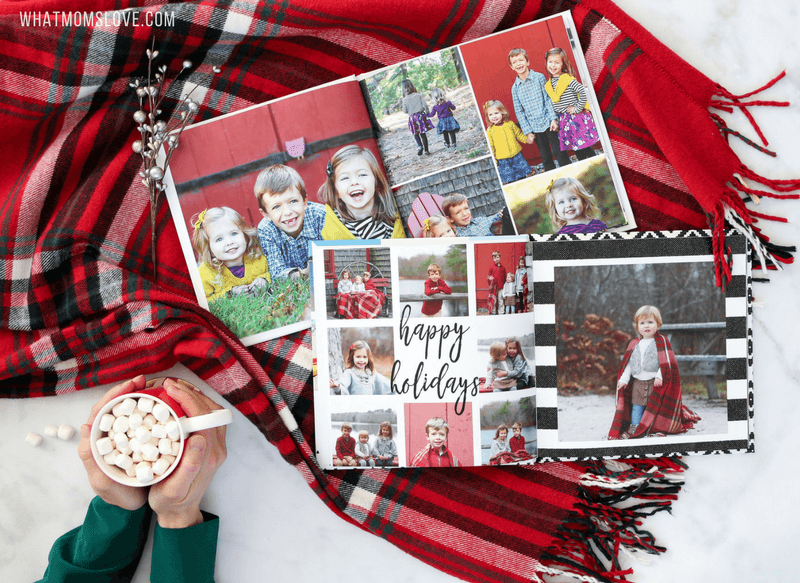
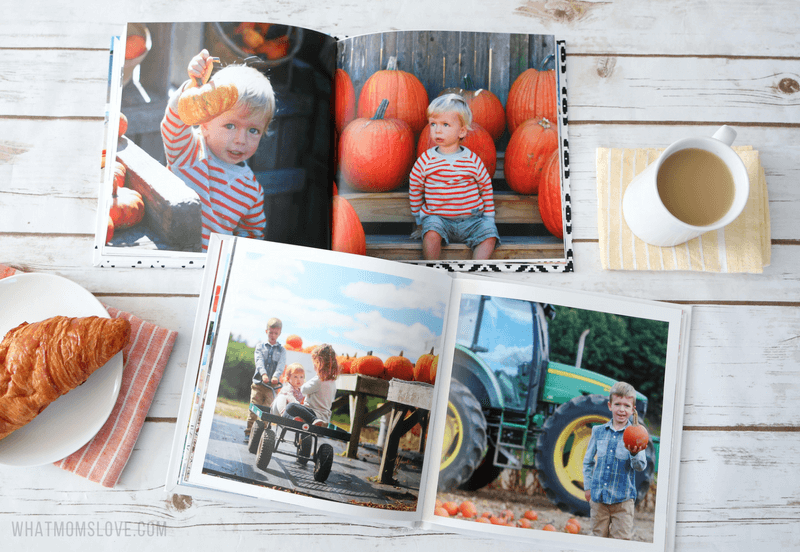
Make sure you give your most important events (vacations, birthday celebrations, anniversaries, Holidays, etc.) or seasonal activities (Apple picking, pumpkin patch, etc.) a full page or two to showcase your favorite photos. Grouping shots from the same timeframe not only gives those memories an extra important feel, but it usually looks pretty impressive visually as well.
If you’re up for it, include a short write-up as to where you went, what you did, who you traveled with, and any fun stories that happened along the way.
3. CREATE AN ART GALLERY
This is one of our all-time favorite ideas, because every parent knows that the struggle of what to do with their child’s artwork is all too real. So instead of just creating a haphazard pile (or in our case, mountain) somewhere collecting dust in your house, do this instead: take a photo of your child’s very best artwork from that year and then include them on a special “Art Gallery” page in your book.
Have fun with it and treat their creations as real works of art by including a caption underneath each one with the name (ask your kids and you’ll get some pretty funny names!), artist name, date, materials and size:
“Girl Standing” by Joanna Lloyd, October 2017, Marker on Construction Paper, 8.5”x11”
If you have multiple kids, make a separate gallery page for each of them.

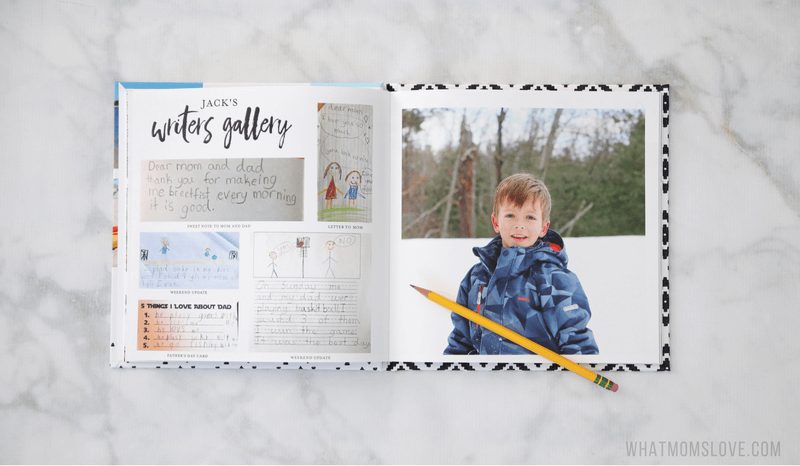
4. CREATE A WRITERS GALLERY
In the same spirit as the Art Gallery idea above, take your child’s best writing samples, photograph them and then display them on one page. We like to include those that made us smile or laugh – ones with funny mistakes, or special cards (think Mother’s Day/Father’s Day) with sweet words we never want to forget.
Even if your child is just learning to write – including a sample of how they attempt to sign their name is a fun memento to look back on and for them to see their progress, year after year. (editor’s note: our kids particularly love to read back through their writing…they often can’t believe it was them that did it!)
5. INCORPORATE SCHOOL MEMORIES
If you have school-aged kids, think about creating a page or two dedicated to memories about their school year. This could include first day/last day pics, their official school headshot or their class photo (we suggest adding some text to record their teacher’s and classmates’ names…you will soon forget!). In addition, if you have any fun snaps from any memorable dress-up/spirit days (perhaps Crazy Hair day or the 100th day of school) put those in as well.
You could even include a quick write-up about what your child enjoyed most/least about school, their favorite snack/lunch to bring, and their favorite friends. Kids love to look back on these memories!
6. MAKE A “TROPHY CASE”
Take photos of any special awards, certificates or acceptance letters your child (or you!) may have received and put them all on one page to create a “trophy case” display. This can include anything from snaps of your child wearing sports medals or holding actual trophies, to photos of comments from report cards or an A+ grade on an important project.
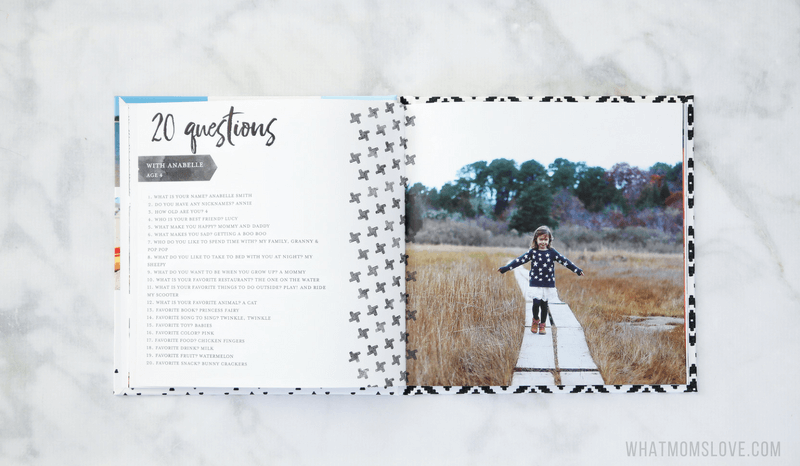
7. CREATE A QUESTIONNAIRE
At the end of each year, ask your kids the same set of questions, and include their responses in your book. Questions can range from “What do you want to be when you grow up?” to “What is your favorite book/movie/song”. We even think it’s fun for the grown-ups of the family to include their responses as well…after all, your kids will love to read through these as they get older.
Click here for our sample list of 20 Questions to Ask Your Kids Every Year.
8. INTERMIX FUN THEMED PAGES
Throughout your book, consider creating some themed pages that are a bit off-the-cuff – ones that feature photos that aren’t as posed and can truly remind you of your family’s unique personality. When grouped all together, they can paint a pretty memorable picture. These could include:
- Instagram/social media photos
- Silly/Blooper/Outtake pics
- Selfies
- Shots taken by your kids

9. MEMORABLE MILESTONES
We love the idea of including a special page devoted to any memorable milestones that happened in the past year. This is especially fun if you have a newborn/young child who is rapidly developing and you can include dates as to when they said their first words, took their first steps or lost their first tooth.
If you you’ve taken monthly milestone photos of your child, make sure you take a page to include them all together for a powerful visual memory.
RELATED: 5 Unique and Easy Ideas For Your Baby’s Monthly Milestone Photos (That Go Beyond The Onesie Sticker)
10. KIDS SAY THE DARNEST THINGS
Now if you’ve really been on top of your game this past year and have written down some of the funny things your children have said, compile their quotes (or stories) to preserve their memory. And if you haven’t done this, consider making a file in the notes section of your phone so you can jot down anything for the coming year…better to start now than never!
11. THE UNEXPECTED
Have you ever wondered what your bedroom looked like when you were a child? Or your favorite reading nook? These types of pictures rarely exist (unless your parents have never moved and have left your room intact!), because it’s usually not a place where you think to take photos of your children. But their bedrooms or other favorites spaces, are often such a reflection of them, and can serve as treasured memories for the future.
12. PHYSICAL MEMENTOS
If you have hard copies of items that you want to save (think sports/concert tickets, acceptance letters, etc), tape an envelope or small folder onto the inside back cover of your photo book so you can slip them all inside, and not have to worry about keeping a separate place for them.
PRO TIPS
As we mentioned earlier, we’ve made our fair share of photo books over the years and wanted to pass along a little wisdom we’ve gained as a result.
DON’T FORGET THE SPINE!
If you’re displaying your books on a bookcase, this is the only thing you’ll see, so remember to include the year (seems obvious, but our first photo book we made didn’t include it and we ended up having to write it on in Sharpie) and use a format you can duplicate year after year. This way all your books will line up nicely on your bookcase (did we mention we’re Type A?!).
KEEP IT SIMPLE
Sometimes less is more. Yes, there’s a zillion options for stickers and backgrounds, but remember what’s really important: the photos! A simple white background with your favorite shots can make a big statement.
And don’t be scared of having white space around your photos – every inch of the page doesn’t have to be covered with photos, text or graphics.

GO BIG
We absolutely love to intermix full-page photos using our most favorite images amongst the collage-type pages. This adds a great variety to the book, and can really make it special.
EDITING SOFTWARE
Editing your photos takes time and some knowledge, but the results are often spectacular. We often don’t have time to edit every single one of the photos that goes into our yearly photo books, but we will put our favorites – those that will be full-page photos or potential cover shots – quickly through an editor.
Our recommendation if you are doing this on a yearly basis is Adobe Lightroom. We usually do small tweaks that include increasing the exposure and decreasing shadows (for a brighter look), and upping the contrast, vibrance and sharpness.
And if you’re not up for that much hassle, Mixbook allows you to adjust the brightness, saturation and contrast of any photo directly in their editor!
RELATED: If you’re looking for general tips on how to take stunning photos, check out our post: How To Get A Blurred Background When Photographing Your Kids In 4 Easy Steps
MIXBOOK TIPS
Mixbook’s photo editor is extremely intuitive to use, but there are still a few tips we’ve discovered over the years that can be really helpful in creating your book:
- Once you’ve uploaded all your photos, use the “Sort By” feature and then group “By Month” for an instant chronological view of your pics
- Click the box “hide used photos” to easily see which ones you still need to find a home for without the others clogging up your thumbnails
- Scroll over your thumbnails to see a larger version or click the “x” to delete them from your project
- You can use your usual keyboard shortcuts to copy/paste/delete text, photos and graphics
- A few templates put white borders around the photos which you might not realize if they’re on a white background. If you then add a photo, it won’t have a border, ultimately making it tricky to line-up. Simply turn off the borders in the pop-up box and everything will snap to the same grid.
- You can mix ‘n’ match themes. If you can’t decide between 2 (or perhaps even 3!) themes, you can use them all! Simply click on the “Theme” button at the top of your project and select a different theme. This will not affect the pages you’ve already completed, but the editor will now show you new layouts based from your newly selected theme.
ORDER MULTIPLE COPIES
Now you’ve done all the hard work, think of eager grandparents or other relatives that would love a keepsake copy to show-off their precious grandchildren. Or order enough copies so you can hand-down a book to each of your children to keep when they’re older.
We have found that if you set aside a little time each day to work on your book, you’ll actually come to enjoy the process, and not find it as stressful as you expected.
And with all of these ideas in mind, do as little or as much as you have the time and energy for – remember, all that really matters is that the memories that are most important to you are included within your book’s covers.
Thanks to our sponsor, Mixbook, for giving us the opportunity to share some of our favorite ideas and tips with you. Make sure to check out their gorgeous, modern photo books for your own yearly creation, plus take a peek at their equally beautiful fully customizable photo cards, calendars, and home décor.
Do you make a yearly family photo book? Tell us your best tips and ideas in the comments below!









I too, have thousands of photos on my devices. I love your tips and may have to try out mix books myself. Thank you
This is the BEST article i have read on making photobooks (and i have read a LOT) – just finished doing 6 years worth of photobooks and these tips were SO USEFUL!!! Thankyou so much!
SO happy to hear that we made the task a little easier!
great ideas! One thing I’m excited about that I included in my photo books are scanned images of holiday cards that we receive. I don’t feel guilty then about discarding the actual card while keeping the pics of our friends and family.
LOVE this idea!!
This blog and this post are amazing!!!! Thank you for creating this and posting such a treasure trove of ideas! I am not as overwhelmed now and SO inspired! I wish I found this 11+ years ago before my first son was born. Such great ideas! Thank you so much for sharing!!!!
You’re so very welcome Denise!