

Looking for fun ways to wrap your child’s gifts this year? With the help of our sponsor, Walmart, we’ve got easy DIY ideas to use their high-quality photos in unique presentations your kids will love.
You finally found the perfect gift for your child – one that you’re pretty sure will elicit squeals of delight once opened. But what if you could make that gift even more special? What if you could make it extraordinary before they even opened it?
Well, with just a few simple supplies and our easy DIY ideas, you can create a wow-worthy gift wrap that is completely personalized to your child.
So whether you’re wrapping for the holidays, a birthday or other special occasion, our creative custom gift wrap ideas will have you (and your gift!) covered.
Note: this post may contain affiliate links. Please see our disclosure policy for more information.
PIN for when you’re ready to wrap!
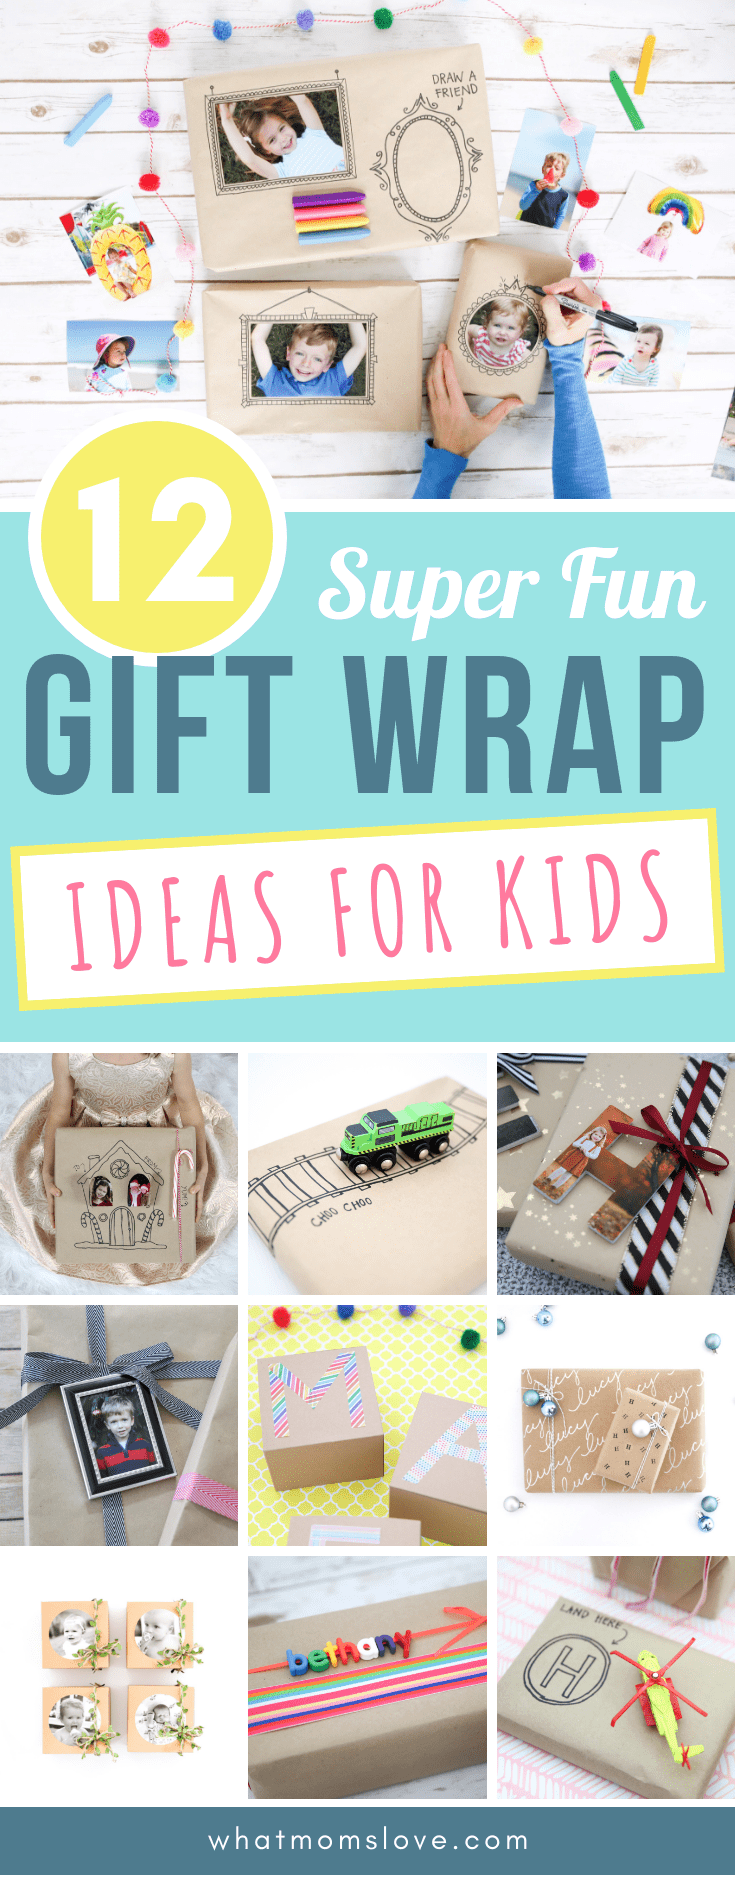
USE PHOTOGRAPHS
We love the idea of using photos of your children, instead of the traditional written gift tags, to label your presents. This works especially well on holidays where multiple people are getting gifts, so your kids can visually see which packages are theirs.
We’ll show you several fun ways this can be done, but first things first, you’ll need to order some photos.
Select a few of your favorites – they can be recent shots, ones from holidays past, or those that capture special memories you’ve shared together – and upload them to an online print specialist.
We used Walmart Photo for all our prints and after the painless, super quick upload, we were able to select the size options we wanted, from standard 4x6s, to larger 8x10s, to custom 4×4 and 5×5 squares.
And get this – we could even edit the photos right within the order. We brightened up many of them and opted to turn some into black and white prints (which only required a single click).
We selected their 1-hour pick-up option so we could get to wrapping right away, but you could schedule an at-home delivery instead. The photos came out flawless and the price was an absolute steal!
Alright, now you have your photos, it’s time to add a little extra pizzazz to create a truly unique presentation that is sure to knock your child’s socks off.
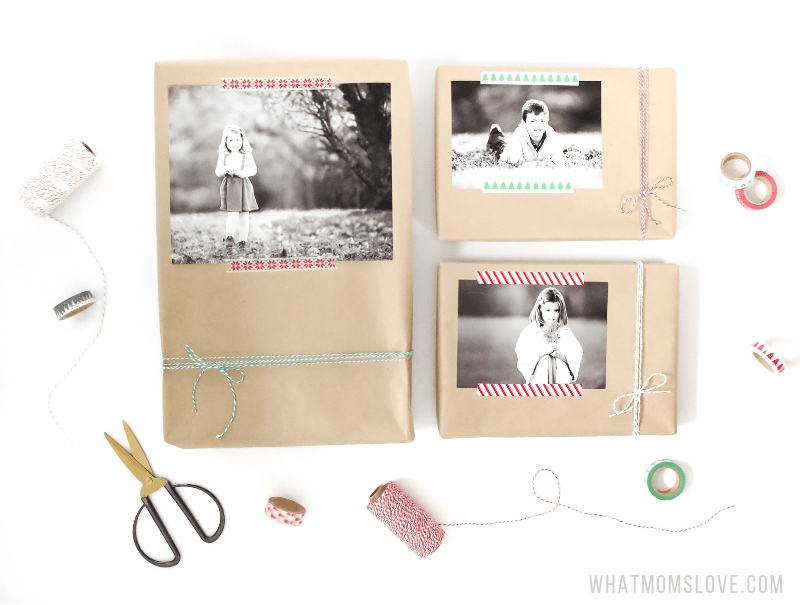
KEEP IT SIMPLE WITH WASHI TAPE
Choose some festive Washi tape, or pick some in your child’s favorite colors, and use a few strips to attach photos to each of their gifts. We love to use a simple Kraft Paper so the photos really stand out (and it’s always great to have on-hand for kids’ to draw, color and craft with). Easy peasy!
Kids absolutely love seeing photos of themselves and find it thrilling to go through the presents to find the ones with their picture.
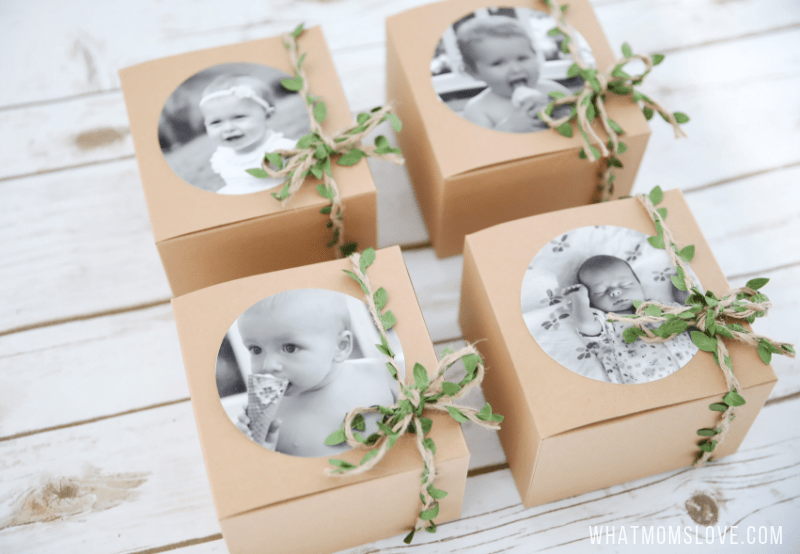
TRY USING BABY PHOTOS
To amp up the fun factor even more, use your childrens’ baby photos. Then listen as they try and decipher who is who. There will likely be a lot of “that’s me”…”no, that’s ME!” going on!
We used this nifty circle cutter tool and a pretty leaf twine for our modern presentation above, but you can get as fancy or simple as you’d like.
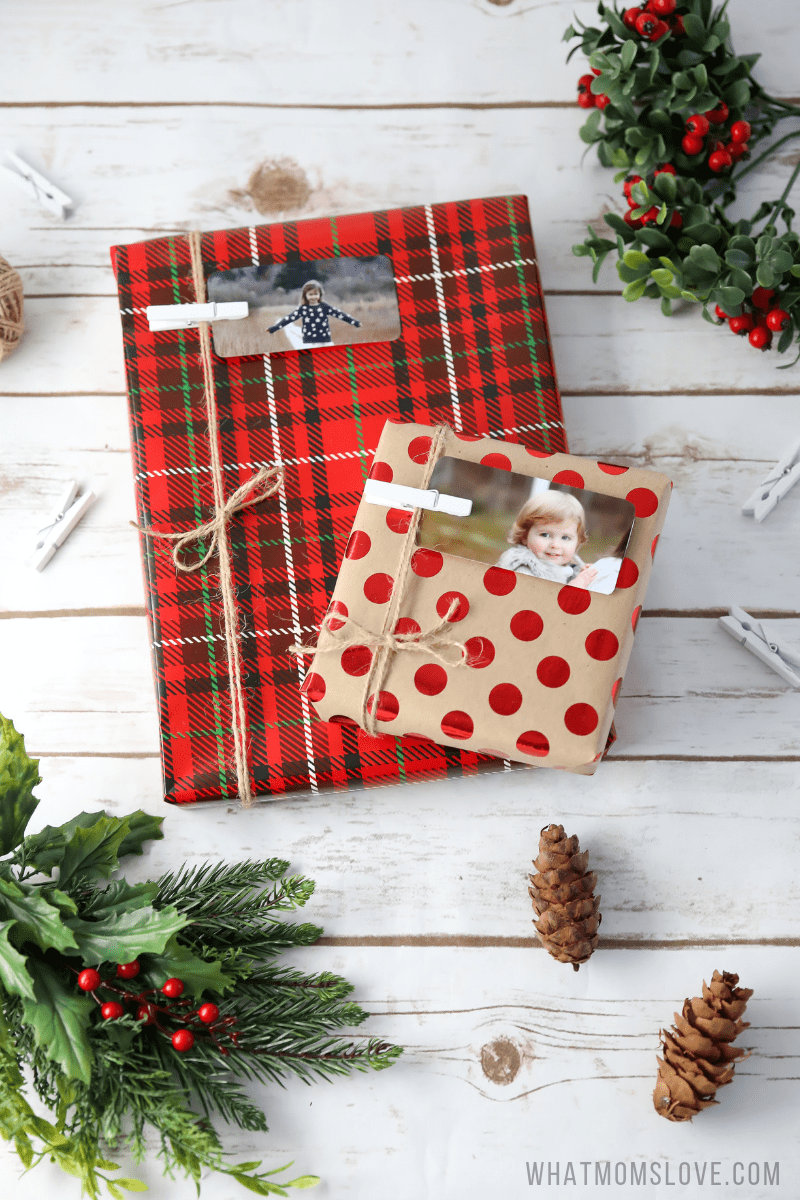
MAKE A PHOTO GIFT TAG
Cut your photos into a gift tag shape and attach them to the gift with a hole-punch and ribbon, or try using these small clothes pins to clip them on instead. After all the gifts have been opened, you can create a photo garland by clipping the photos to a piece of ribbon or twine.

USE MINI PHOTO FRAMES
Use a small photo frame, to serve as your photo gift tag. You can then display the frame in your home, or hang it from your Christmas Tree as an ornament.

CREATE A PHOTO INITIAL TAG
Double the personalization by cutting a photo into the shape of their initial. We traced small wooden letters onto a photo, then cut and attached them with some double stick glue tape. Tie them on with pretty ribbon and then sit back and watch your child’s delight as they find their custom letters.
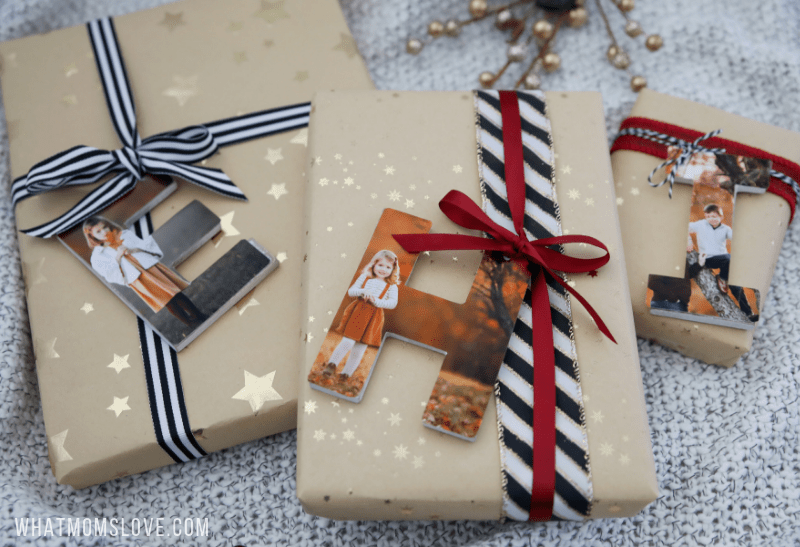
Again, these can be reused as ornaments or hung from a mantle once the presents have been opened.
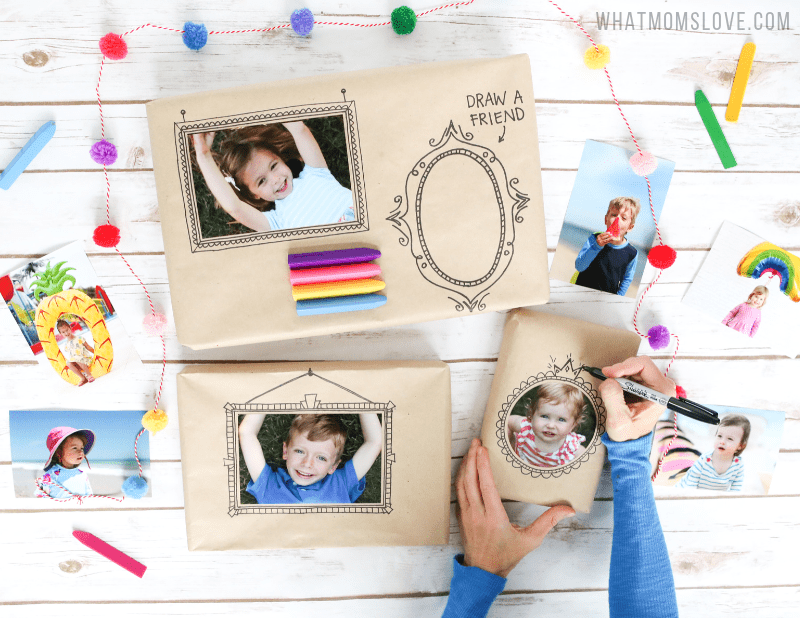
DRAW ON A FRAME
Fancy-up any photo by drawing a custom frame around it – just a few simple lines will transform it from ordinary to extraordinary. You can even make it interactive by asking them to color in the frame or draw a friend or self-portrait in a blank frame. Let your creativity soar with this one!
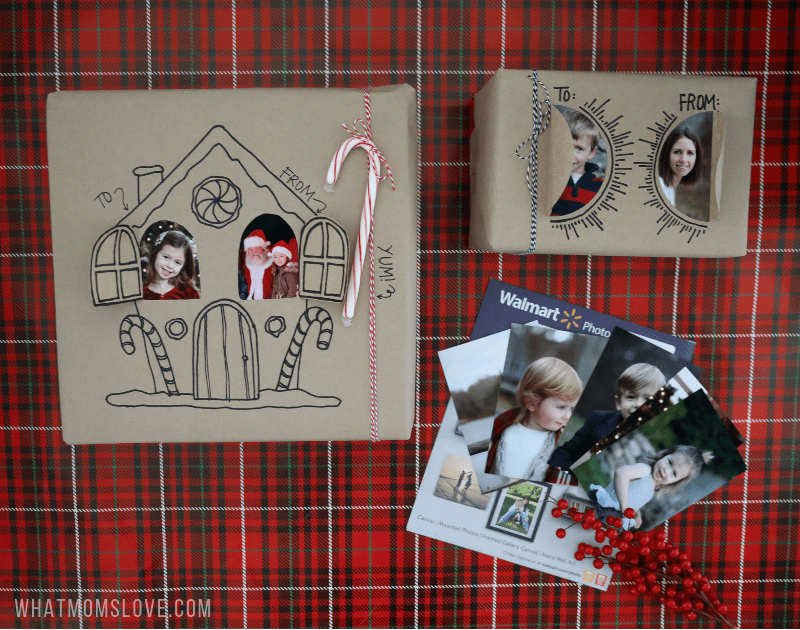
CREATE CUSTOM PEEK-A-BOO WRAPPING PAPER
This is our absolute favorite idea on our list, and got rave reviews from our kids who thought it was just the coolest thing ever. Make peek-a-boo cutouts on your wrapping paper using an X-acto knife and then attach photos behind them. Your kids can open up the flaps to see who the present is “to” and “from”.
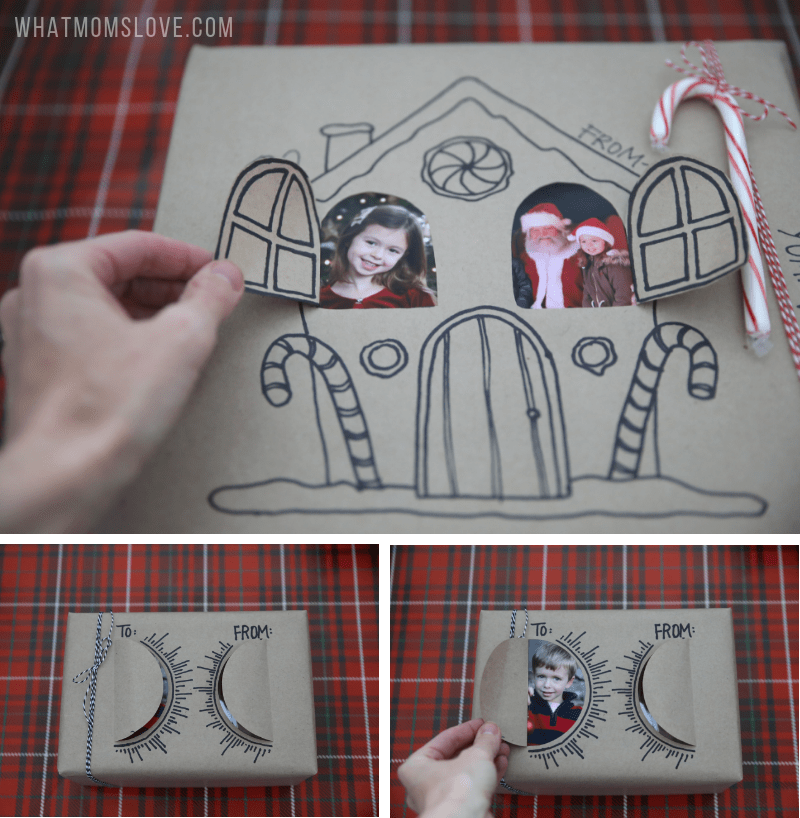
You can get as creative as you’d like – from simple to/from to an elaborate gingerbread house…which of course, in this instance, Santa gets all the credit for.
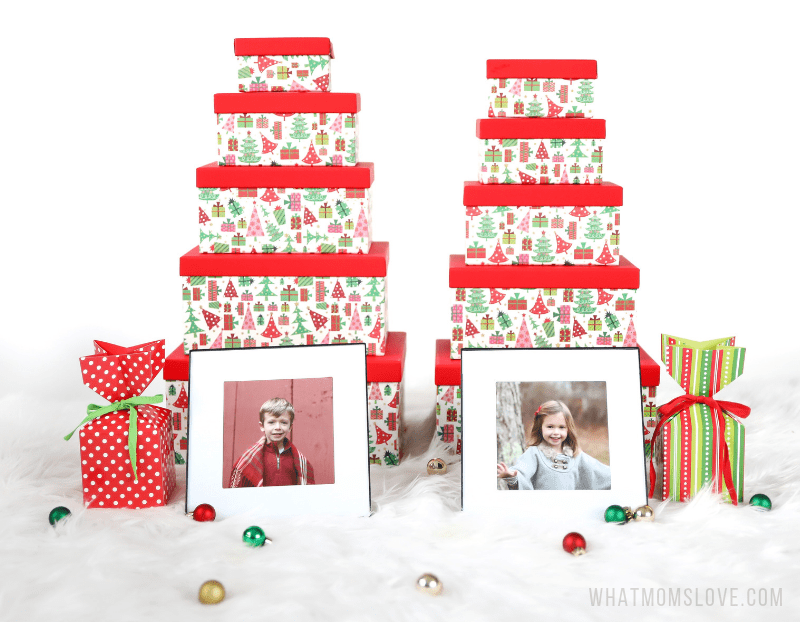
MARK THEIR STACKS
If labeling each gift is a little too involved for your taste, try labeling your child’s pile of presents instead. Pop a photo in a simple frame (we love these Mainstays Format Frames from Walmart – modern lines and amazing price!) and place in front of their stack. The presentation is pretty impressive with all their presents grouped together, and bonus –you’ll get a frame to display after the opening is complete.
USE THEIR NAME/INITIALS OR FAVORITE THINGS
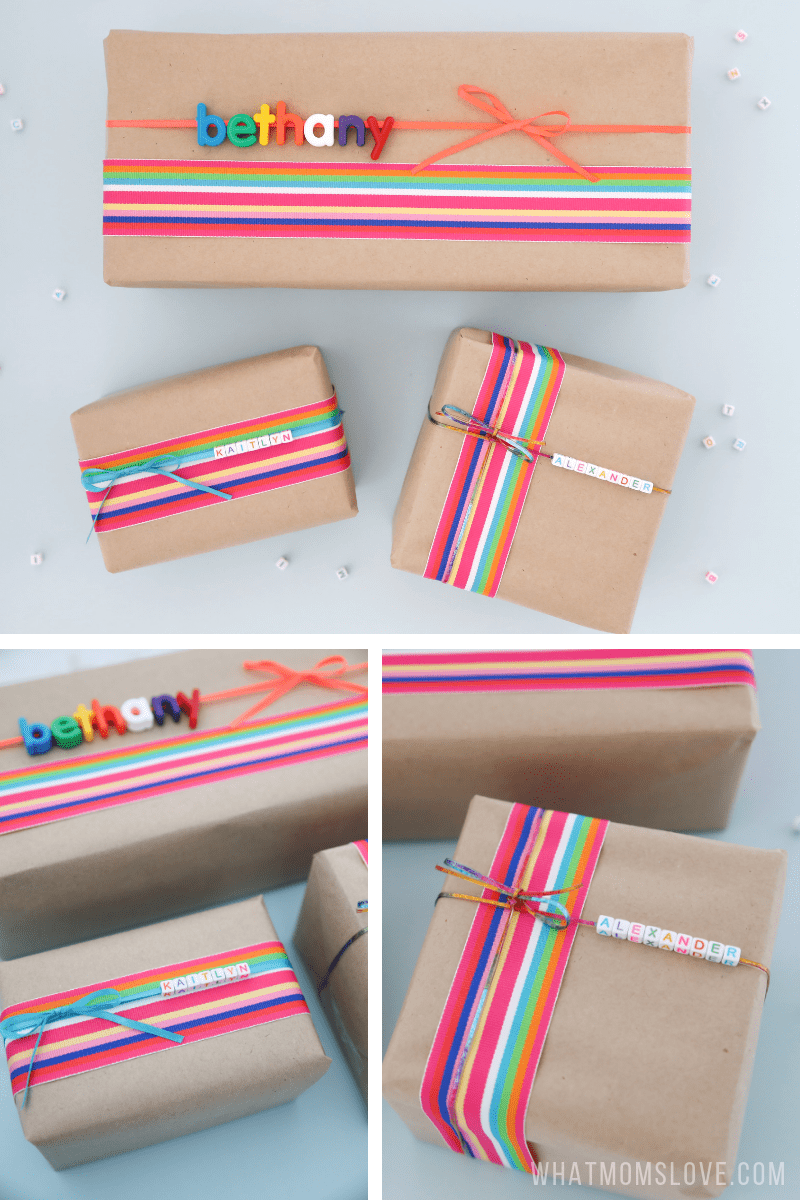
USE BEADS TO LABEL
How fun is this idea to mark your child’s present with their name using beads?! Try these big colorful ones, or smaller alphabet cubes, and they can also double as a personalized necklace or bracelet. This was definitely a kid favorite!
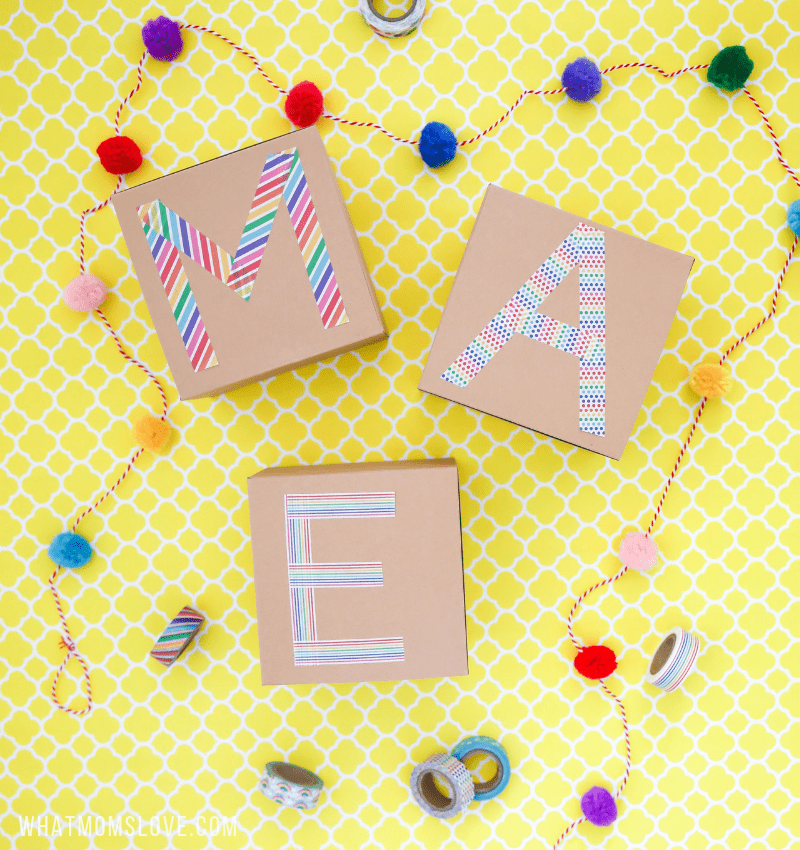
CREATE A WASHI TAPE INITIAL
Or wrap your present in a solid gift wrap (again we used our favorite Kraft paper) and grab some fun Washi tape. Use it to make their initial on the package, or if you have several presents you want them to open in a specific order, mark them as “1”, “2”, etc.

MAKE CUSTOM WRAPPING PAPER
Transform a roll of plain Kraft paper into fancy, personalized wrapping paper. Take a metallic Sharpie and write their name in cursive repeatedly across it. Or grab a simple alphabet stamp and stamp their initial all over. Takes no time at all, but looks super impressive. And more importantly, makes your child feel super special.
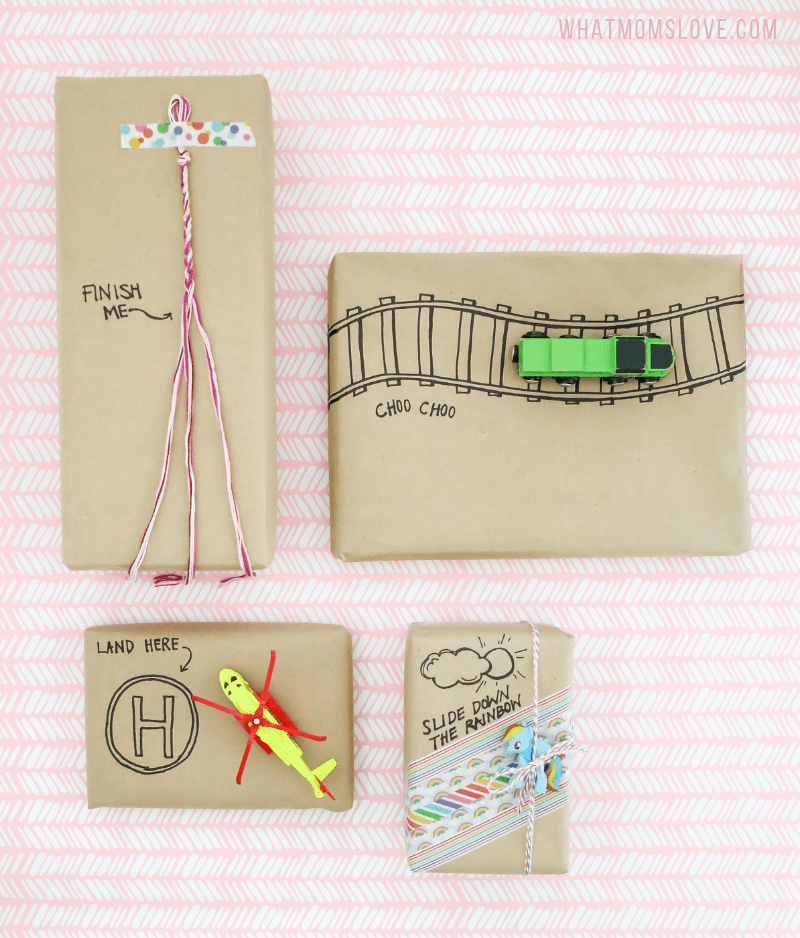
USE THEIR FAVORITE THINGS AS AN INVITATION TO PLAY
Create a gift they can “play” with before they even open it, by using some of their favorite things and simple written suggestions.
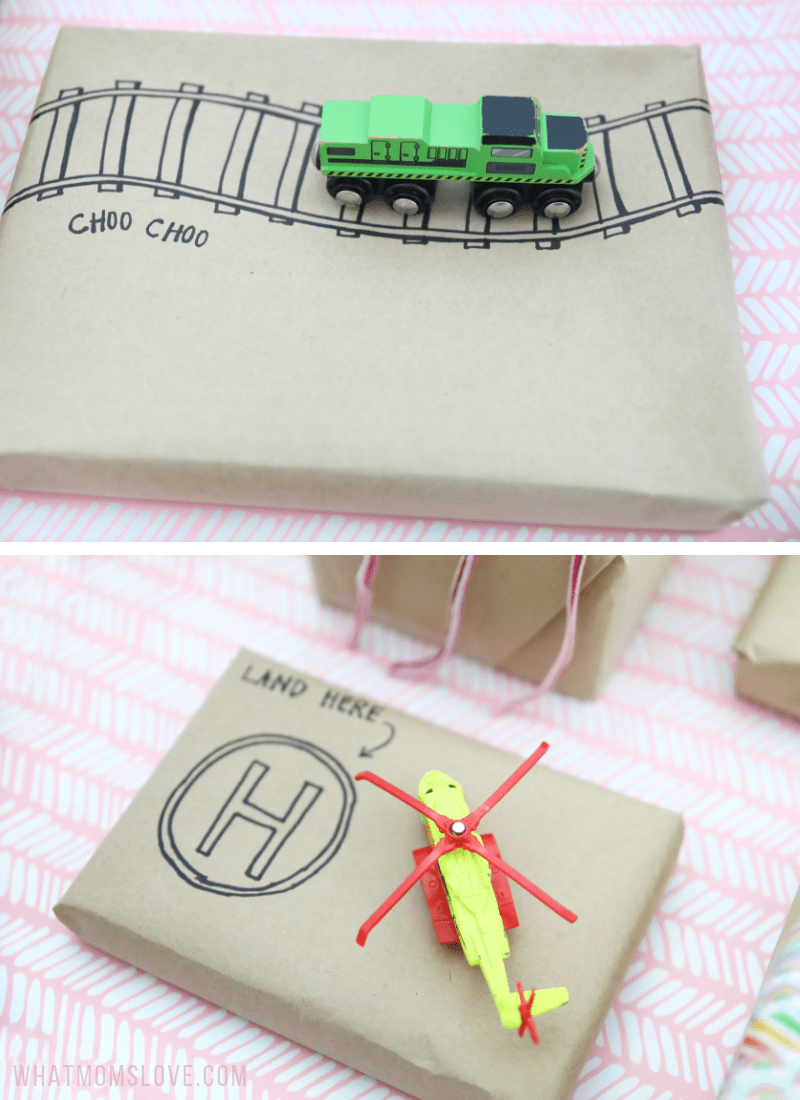
Got a vehicle-lover? Draw on a road and include a car, a construction site with an excavator, or as we did here – some rail road tracks with a train, or a helicopter with a landing pad. They won’t even care what’s inside when the wrapping is this fun!
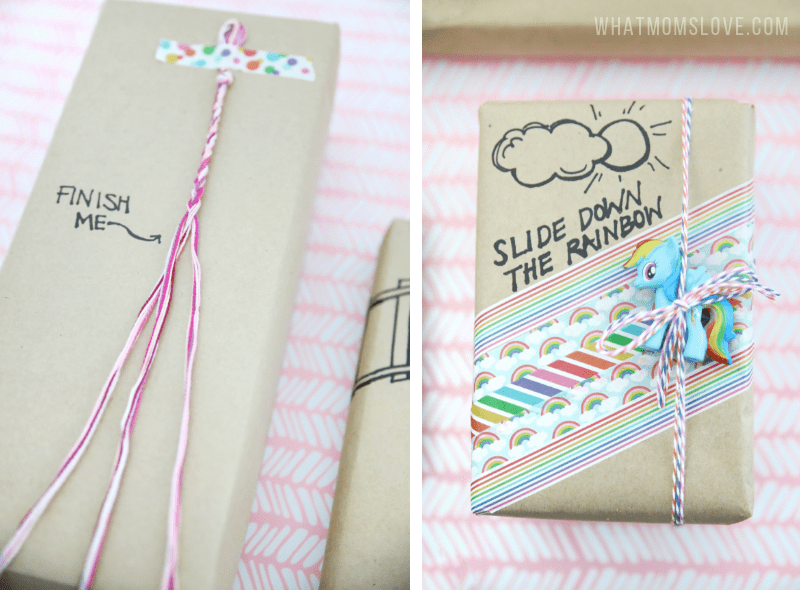
How about a crafty kid? Start a friendship bracelet and attach for them to finish (even better if the gift inside is some sort of craft set!).
Or pick your child’s favorite character du jour, and tie one on top in a fun play setting – like the one we created for Rainbow Dash with some simple Washi Tape and baker’s twine.
We hope we’ve sparked your creative juices with these simple, personalized, do-it-yourself gift wrap ideas.
Thanks again to our sponsor, Walmart, for providing each an easy way to print high-quality photographs at everyday low prices.
Your gifts will truly shine with these extra special custom touches. Happy gifting!
Suggested Supplies
USE THEIR NAME/INITIALS OR FAVORITE THINGS
USE BEADS TO LABEL
How fun is this idea to mark your child’s present with their name using beads?! Try these big colorful ones, or smaller alphabet cubes, and they can also double as a personalized necklace or bracelet. This was definitely a kid favorite!
CREATE A WASHI TAPE INITIAL
Or wrap your present in a solid gift wrap (again we used our favorite Kraft paper) and grab some fun Washi tape. Use it to make their initial on the package, or if you have several presents you want them to open in a specific order, mark them as “1”, “2”, etc.
MAKE CUSTOM WRAPPING PAPER
Transform a roll of plain Kraft paper into fancy, personalized wrapping paper. Take a metallic Sharpie and write their name in cursive repeatedly across it. Or grab a simple alphabet stamp and stamp their initial all over. Takes no time at all, but looks super impressive. And more importantly, makes your child feel super special.
USE THEIR FAVORITE THINGS AS AN INVITATION TO PLAY
Create a gift they can “play” with before they even open it, by using some of their favorite things and simple written suggestions.
Got a vehicle-lover? Draw on a road and include a car, a construction site with an excavator, or as we did here – some rail road tracks with a train, or a helicopter with a landing pad. They won’t even care what’s inside when the wrapping is this fun!
How about a crafty kid? Start a friendship bracelet and attach for them to finish (even better if the gift inside is some sort of craft set!).
Or pick your child’s favorite character du jour, and tie one on top in a fun play setting – like the one we created for Rainbow Dash with some simple Washi Tape and baker’s twine.
We hope we’ve sparked your creative juices with these simple, personalized, do-it-yourself gift wrap ideas.
Thanks again to our sponsor, Walmart, for providing each an easy way to print high-quality photographs at everyday low prices.
Your gifts will truly shine with these extra special custom touches. Happy gifting!
Suggested Supplies


2 Comments